Sunday, 6 May 2012

White Chocolate Cupcakes


The piece that completes any stylish kitchen is a Kitchenaid Artisan Stand Mixer and since living in student housing means it will be a while before I own a stylish kitchen, the mixer is all the more important to bring some colour and life into a kitchen that has only ever produced KD.So after waiting for the perfect sale (and an additional sale by signing up for a credit card) along with a mail-in rebate (which we're still waiting for), I finally purchased my very own Kitchenaid in Ice Blue. In celebration of my expensive purchase (and to make sure it works!) I made white chocolate cupcakes today!

White Chocolate Cupcakes: (makes 18)

Ingredients:
1 1/2 cups all purpose flour
1 tsp baking powder
1/2 tsp salt
1/3 cup butter, softened
3/4 cup sugar
2 large eggs
4-oz white chocolate, chopped
1 tsp vanilla extract
1 cup plus 1 tbsp milk


Directions:
Sift together flour, baking powder and salt in a bowl and set aside.


Melt chopped white chocolate in a microwavable bowl for 30 sec. at a time stirring well with a fork in between.


Mix butter and sugar until smooth and creamy. 
Beat eggs one at a time until fully blended. Mix in white chocolate and vanilla.
Add flour mixture in three batches alternating with milk.

Divide evenly into muffin liners and bake at 325 degrees for 20-23 minutes.


White Chocolate Cream Cheese Frosting:

Ingredients:
4-oz cream cheese, room temperature
1/4 cup butter, room temperature
1-oz white chocolate, melted and slightly cooled
1 tsp vanilla extract
3 tsp milk or cream
2-3 cups confectioners’ sugar


Directions:
Melt white chocolate.

Mix cream cheese and butter together for approximately a minute.

Add white chocolate, vanilla and milk.

Reducing the speed add the confectioner's sugar a little at a time. I used much more than what was called for  but I judged the amount based on the consistency. I continued to add the sugar until peaks would form when I lifted the paddle out of the bowl. This would be for piping consistency but if you plan to ice with a knife then peaks aren't necessary.


To finish them off I garnished the tops with slivers of white chocolate and almonds (my intention were macadamia nuts but they were a little too difficult to find at the supermarkets).


Saturday, 7 April 2012

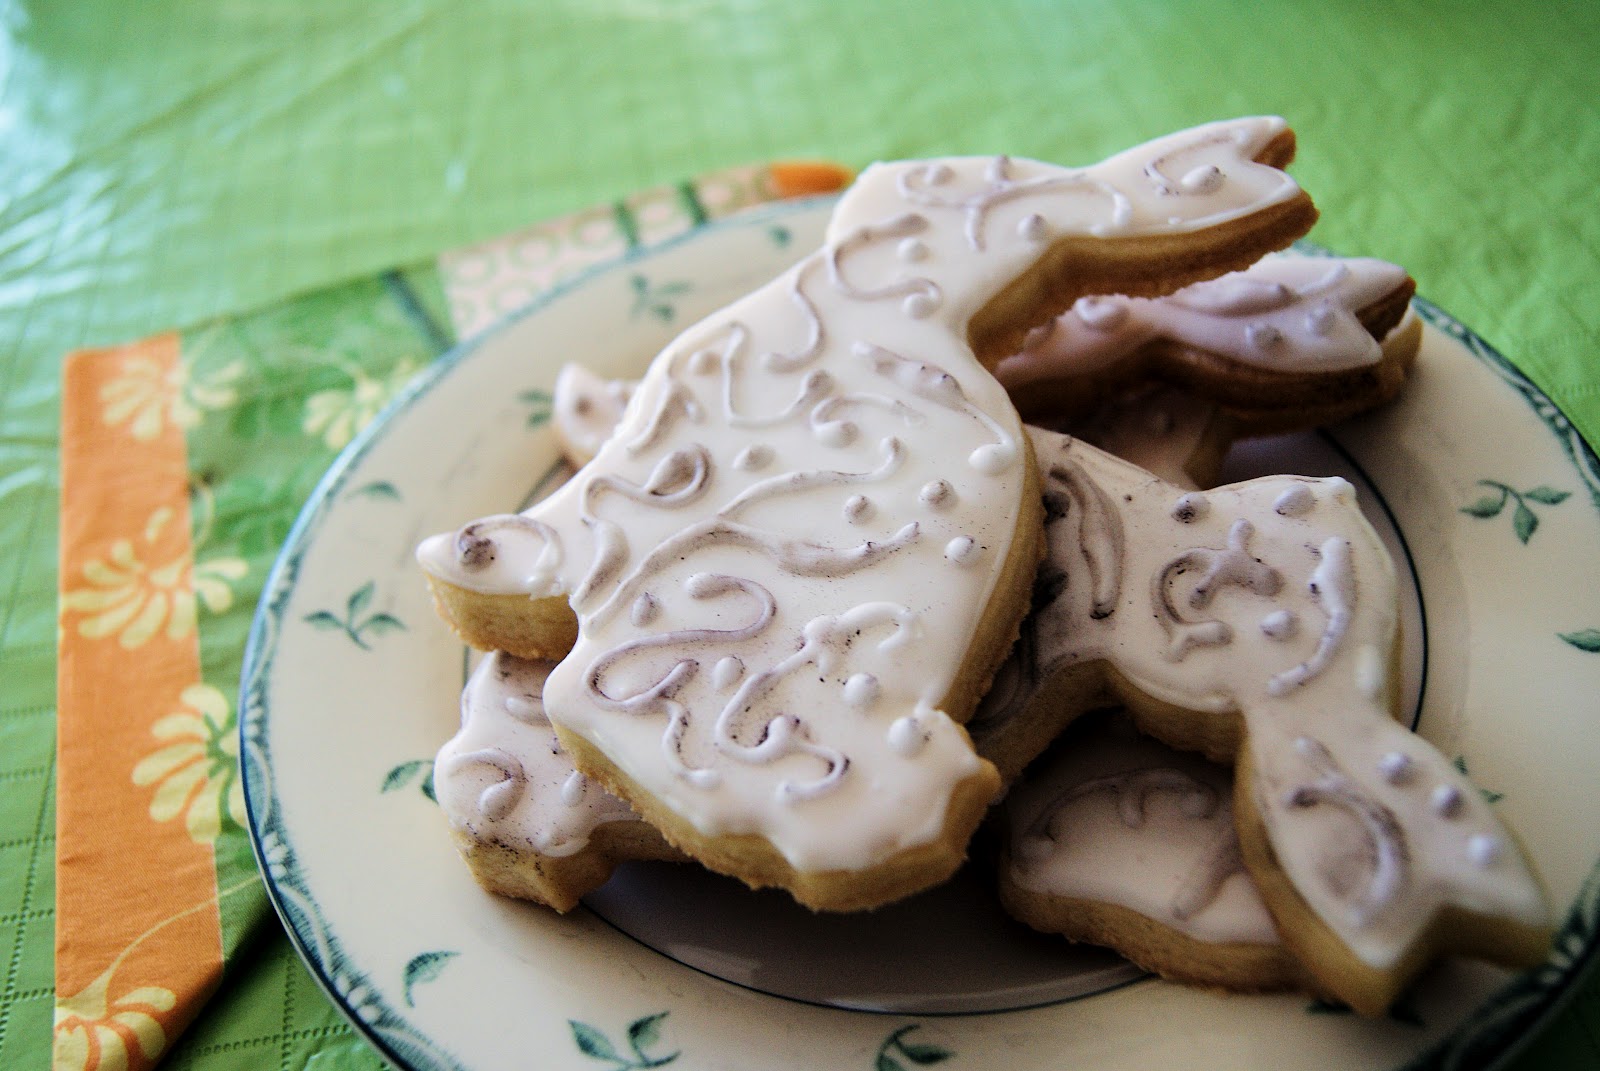
Rustic Bunny Cookies


When I first delved into the world of baking I relied mostly on books for recipes and inspiration but earlier last year I was introduced to the world of baking blogs and food gawker. From that point on I've been bookmarking everything I came across. One of the first posts that I bookmarked was the Anthropologie inspired Easter cookies made by Sugarbelle (which can be seen here: http://www.sweetsugarbelle.com/blog/2011/03/anthropologie-inspired-easter-cookies/) and I had to visit this post again for Easter.

For this post I won't discuss the recipe used for sugar cookies but the decoration process instead.

Royal Icing:

-2 cups icing sugar
-4 teaspoons meringue powder
-water as needed

The icing is very easy and simple to make. It doesn't take long to use instinct when making the icing rather than a recipe. When making cookies there are two types of royal icing needed to make: piping and flood. Piping consistency can be stiff peaked (when you lift a spoon out of the icing the peak will stay in place) or soft peaked (when you lift a spoon out of the icing the peak will fold over but still remain raised). The consistency that is easiest to work for (especially for your hands!) is soft peak royal icing. When making this its easiest to add water in small increments until the consistency is right.


Using a number two piping tip, trace an outline of the cookie cutter, pressing down on the cookie when you start and stop and otherwise hovering a centimeter above the cookie.


The second type of royal icing needed is flood icing. Flood icing requires more water and when the spoon is lifted from the icing the icing will blend back together. This icing is poured into a squeeze bottle and then dispensed on top the cookie. It can be spread with the tip of the squeeze bottle or a toothpick. 


When the flood icing has dried, approx. 3 hours, using another batch of piping icing and size two tip I free-handed a ornate floral pattern. This was much more tedious because I had to come up with the pattern as I went. This layer will take another few hours before it dries.


The last step to making these cookies is to add the rustic details to the pattern. Using a paintbrush (Wilton makes their own and its best not to use one that's been used for actual paint) and a dark brown dusting powder (I used Dark Chocolate by Crystal Colors) brush on the powder just to the second layer of piping. The wetter your brush is the darker the powder will be when applied which is something to keep in mind. 


Friday, 30 March 2012

Bird Nest Cupcakes


Easter is only a weekend away now and what I like best about Easter is the excuse to make cute, spring-themed sweets. A popular trend which is incredibly easy to do is to make cupcakes that resemble bird nests. The decorations for these cupcakes look adorable but don't require you to make anything which makes it the perfect Easter treat to impress your family. I will warn you ahead of time that this recipe is a little heavy and its certainly not make favourite but as of yet I haven't found the perfect white cupcake recipe.

White Cupcakes (Martha Stewart)

Ingredients:
-3 1/4 cups sifted cake flour
-1 1/2 tablespoons baking powder
-1/4 teaspoon salt
-1 tablespoon vanilla extract
-1 cup and 2 tablespoons milk
-1/2 cup and 6 tablespoons unsalted butter
-1 3/4 cups sugar
-5 large egg whites


Directions:
Sift together cake flour, baking powder and salt in a medium bowl.

In a small bowl, stir vanilla and milk together and set aside.

In a large bowl, cream butter until smooth. Gradually add sugar until pale and fluffy. Reducing the speed of the mixer, add flour mixture in three batches, alternating with milk mixture.

In another medium bowl, whisk the egg whites until stiff peaks form, careful not to overmix. Fold egg whites into the batter in three batches.

Divide the batter into muffin tins and bake for up to 18-20 minutes at 350.

When the cupcakes are cooled, lightly cover them in your favourite icing. Place the desired number of egg candies in the center and surround the eggs in coconut. I toasted my coconut to brown it which I did on a cookie sheet in the oven but it looks equally as nice with the coconut shavings still white.

(hatching?)