Monday, 3 December 2012

Royal Icing Transfer Tutorial and Oxfam Cookies


So now we're into December, the month of baking and exams. And while we're all trying to learn what exactly was going on in those lectures we've been "going to" all term, we can also learn a few new techniques when it comes to our holiday baking.

I'm sure everyone has come across a cookie or some other icing decoration and thought, how could someone possibly have made that so perfect? Well, if that person had a few hundred bucks to throw around, they could have used a projector designed specifically for baking to trace the design, or they could have made transfers traced onto wax paper. 


The process of making royal icing transfers is quite simple, however because icing is not the strongest of mediums, I recommend making many back-ups as they will break.

What you need:
-soft peak icing 
-flood icing
-piping bag with a number 2 tip
-squeeze bottles

To begin, grease a sheet of wax or parchment paper with butter.

Under the wax paper place an image of what you trying to create. The technique works best with simple images like logos and lettering. An image with layers such as eyes on a person or animal will be more difficult to trace.

Pipe outlines of the image. 


It's best to begin flooding the transfers before the piping dries. This will reduce the chance of the piping breaking.


After a few hours the transfers may seem dry but believe me when I say they won't come of the paper clean until they've dried overnight. 
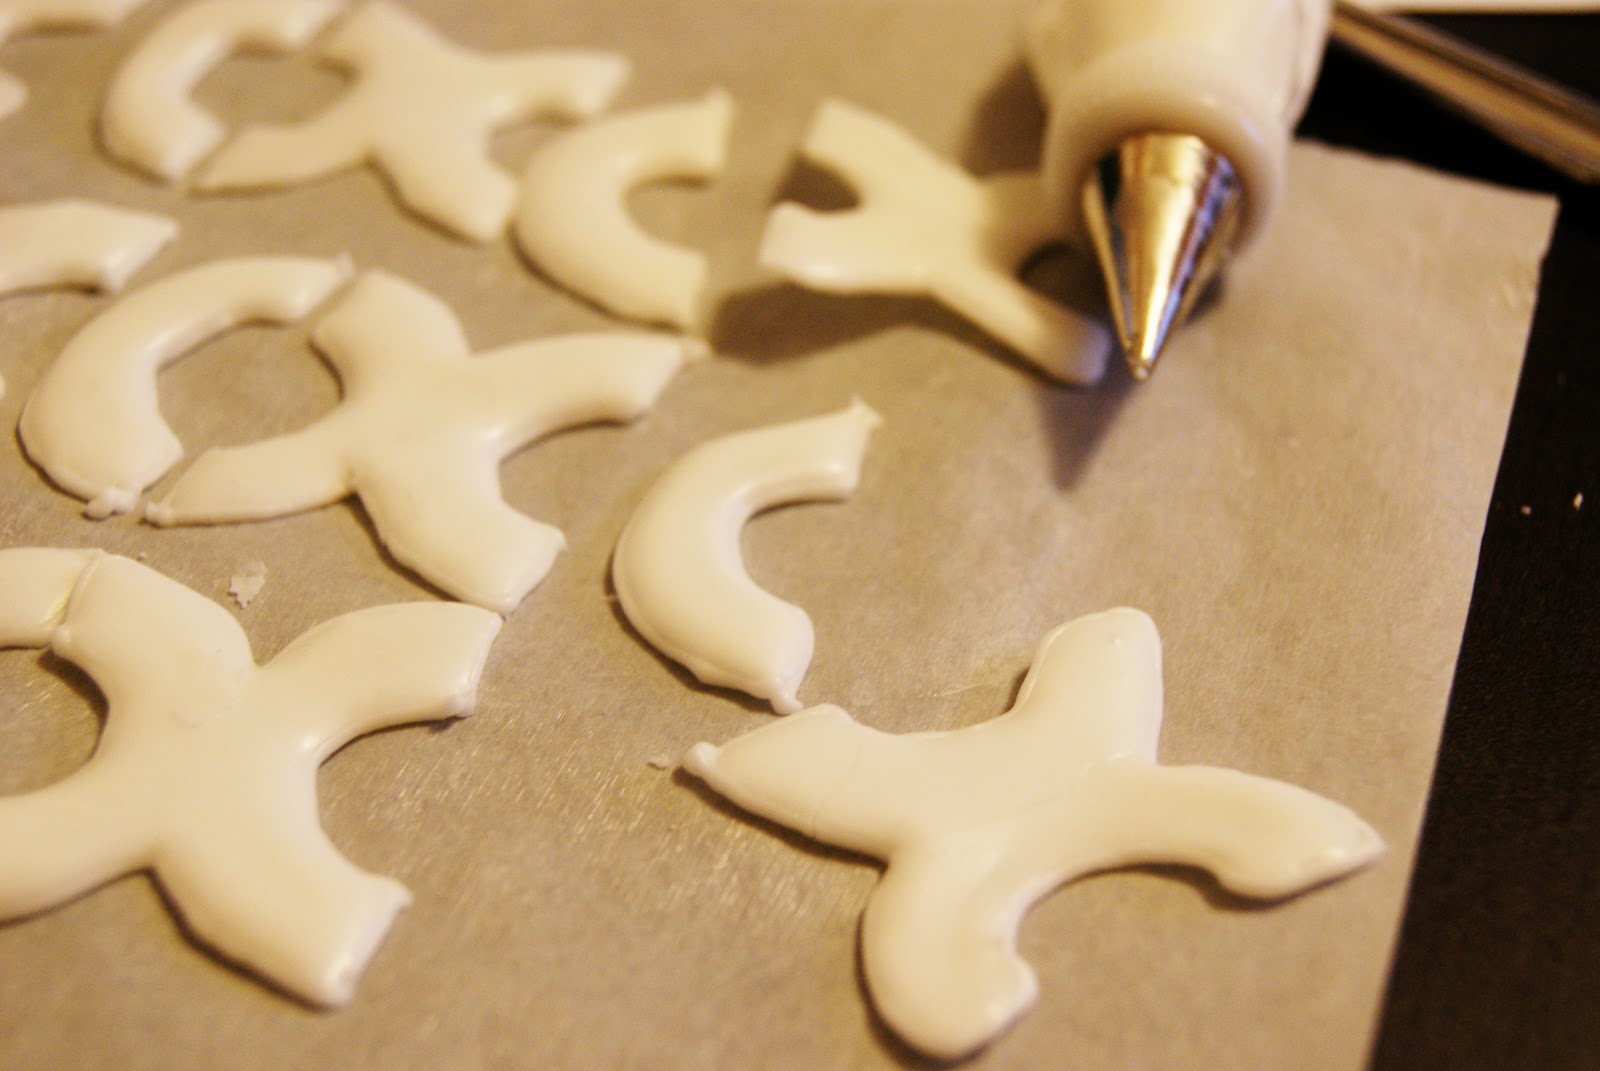

After drying overnight, gently slide them off the paper with a small off-set spatula or pry them off even more gently with a knife.

Pipe the backs with royal icing and secure them to your cookie.


Tuesday, 27 November 2012

Snickerdoodle Cupcakes


Like every school year ever and like every student ever, I've fallen into the November slump. And while despite the the forever cramming for midterms in October ending, November means its cold and I need to save my motivation for final exams. That sounds fair right?

Well thanks to my friend, I actually got around to baking again and surprise, surprise, it's a cupcake. I keep thinking it's about time I stop baking cupcakes and start baking more of a variety of sweets but in all honesty cupcakes are such a crowd-pleaser and I don't bake for myself, I bake for my friends.

So my friend Katie picked out a recipe, which I happened to own from Martha Stewart, for snickerdoodle cupcakes and being the kind souls that we are, we gave them out to our friends and performers at a coffeehouse that we helped organize.


Snickerdoodle Cupcakes (makes approx. 30)
Ingredients:
3 cups minus 2 tablespoons all purpose flour
1 tablespoon baking powder
1/2 teaspoon salt
1 tablespoon ground cinnamon
1 cup unsalted butter
4 large eggs
1 3/4 cups sugar
2 teaspoons vanilla extract
1 1/4 cup milk

Directions:
Preheat oven to 350 degrees and line your muffin tins.

Sift together dry ingredients in a medium bowl and set aside.

Cream butter and sugar together until pale and fluffy with a mixer on medium speed in a larger bowl. Add the eggs one at time, mixing until completely incorporated. Add vanilla. Add the dry ingredients in three batched alternating with milk and making sure to scrape down the sides of the bowl so everything is well incorporated. 

Fill the cupcake liners 3/4 full and bake for 20 minutes. When cooled frost with your favourite buttercream or cream cheese frosting.

Notes: Baking in student housing, as I'm sure I've said before, means the ovens usually have a mind of their own. Despite baking at a lower temperature than 350 I found the first batch came out with a stiff top but the insides were still light and fluffy. Not only is this recipe a keeper, I think it may also be foolproof.   


Sunday, 14 October 2012

Pie Time!


Now that fall is finally here and the weather is cold enough to make you contemplate getting out your winter coat, it is time for fall baking! Which means while everyone is baking "pumpkin spice" everything, I was trying out pies (not pumpkin pies) for the first time. 

The idea seemed simple enough which was to buy pie crust and raspberry jam and cookie sticks, combine and bake. Actually, it seemed fool proof and they looked beautiful going into the oven. The problem took place in the oven where the pies went from "thanksgiving" to "halloween". I'm not sure if it was because the vents I cut weren't big enough or if it had to do with the sticks, but in the oven the pie crusts separated and oozed jam everywhere which made it look like a bloody mess.


Thankfully some of them came out clean like the one bellow and regardless of the appearance they were tasty. And since this blog has become more unsuccessful than successful in my baking pursuits, I'll be making sure to put up some good, classic recipes that were also brought to our thanksgiving feast.